


This is a common error that is faced by a lot of WordPress users while uploading content to their WordPress website. This can be annoying for beginners because they will find it hard to fix or troubleshoot this problem. WordPress gives you the advantage of uploading certain types of files but this error hampers the functionality of WordPress. Whenever you try to upload any file then “Upload: Failed to write file to disk”. In this article, we will suggest to you the effective steps that can be implemented to troubleshoot this problem
Possible causes that can led to ‘failed to write file to disk error’
The possible reason that can result in uploading errors can be incorrect folder permissions. The permissions that you assign to a folder make it possible to access and perform read/write operations. But if you set incorrect folder permissions in WordPress it stops you from uploading and stops the write operations as well. You are no longer able to write or add files to a specific folder. Whenever you try to do so the given error messages will be displayed :
- WordPress failed to write to disk.
- WordPress has failed to upload due to an error.
- Unable to create directory wp-content/uploads/xxxx/xxxx.
Now we will try to get the effective solution for the ‘Upload failed’ error.
Troubleshooting the error “Uploading failed to write to disk”
Change Folder permissions
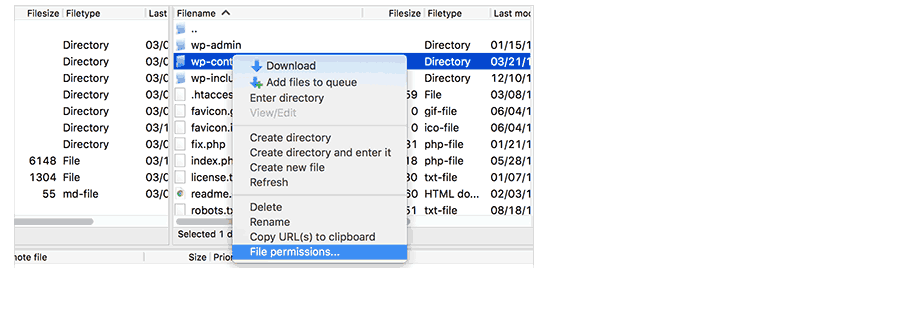
- Simply use an FTP client to get connected to your website. You can use FileZilla for this purpose.
- After getting connected, right-click on the wp-content folder and click on permissions.
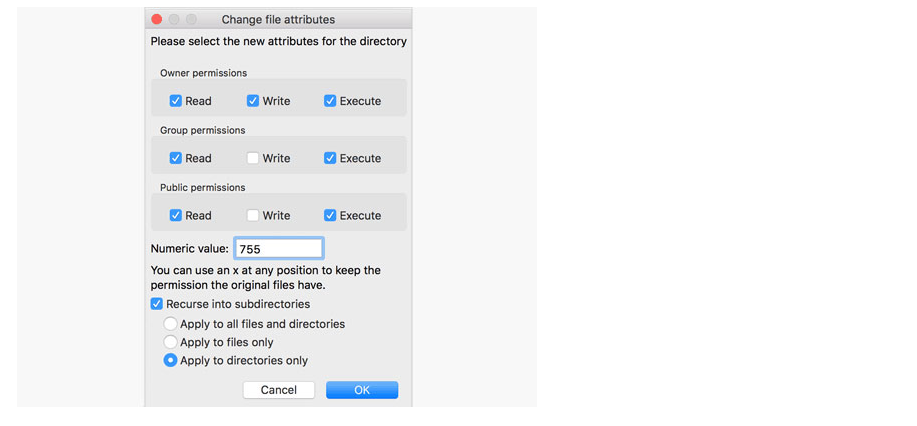
- A file permission dialog box will get displayed, where you can set the file permissions for the owner, group, and public. Just enter ‘755’ into the numeric value field.
- Also, check on the box ‘Recurse into subdirectories’ and select the radio button option ‘Apply to directories only’. Then simply click on ‘Ok’.
- Now you have set the permissions ‘755’ to Wp-content and all of its subfolders.
- You also need to check the individual file permissions of the files in the Wp-content folder.


Change File permissions
- Now we will change the file permissions for all the files.
- Right-click on the Wp-content folder and click on permissions similar to the second step.
- In the file permission dialogue box, this time you have to enter the numeric value ‘644’ and check on the box ‘Recurse into subdirectories.
- Now simply select the radio button ‘Apply to files only’ and then click on ‘Ok’. The permissions for all the files in the Wp-content folder have been set to 644.
- Next, you can revisit your WordPress website and try to upload files again.
- If you have successfully uploaded the files, it means you have fixed the error. But if the error is still there you can contact the Web hosting provider to get your problem to troubleshoot.
Other Possible causes and solutions
In WordPress, your uploaded images are saved in a temporary folder on the web server and then the files are moved to the Wp-uploads folder. If the temporary folder that is located on the server gets full or is misconfigured, then you would not be able to upload files anymore.
To deal up with this issue you can contact your Webhosting provider and they will take the necessary to make the temporary folder empty.
Conclusion
In this article we have suggested some of the possible causes of the error ‘Upload: failed to write File to disk’. To fix the issue we have mentioned the detailed stepwise solutions that would be helpful to fix the error and make your website fine again