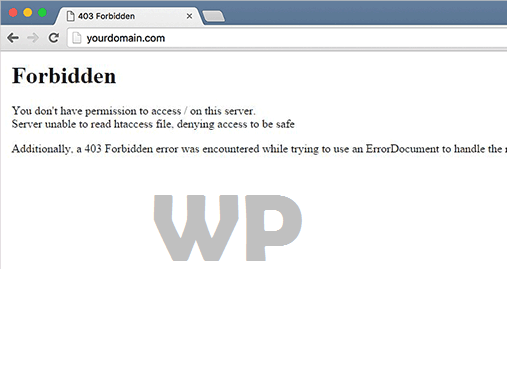
Remember when you want to visit a particular page of a website and the server denies giving you access to the webpage with a warning message. The warning message will be given as below.

There can be several reasons behind this problem and this error can be encountered in many situations such as:
- Access denied while logging in on the login page.
- During the installation of WordPress.
- When we try to search for a specific page on the website.
Possible causes of 403 Forbidden Error in WordPress
The following might be the possible causes that are blocking you from accessing a webpage or performing any configuration activity on WordPress:
- Faulty configuration of the security plugins can be responsible for blocking IP addresses because they categorize them as malicious.
- Another possible reason can be a corrupt .htaccess file.
- Wrong file permissions can also be a possible reason for this issue.
- Sometimes the hosting company makes some changes in the server settings by mistake and that could lead to blocking you from your website.
Troubleshooting 403 Forbidden Error in wordpress
Before doing these troubleshooting tricks we recommend you to back up your wordpress site. You can use the automatic wordpress backup plug-in for that purpose.
1. Troubleshooting 403 Forbidden error problem caused by a WordPress plug-in
While following this trick you have to deactivate all the WordPress plugins temporarily. This can be a clear solution to your problem if any of the existing plug-ins is causing issues and blocking you on your website. You can also detect which plug-in is causing the problem by switching them off one by one and then observing the result.
2. Check Your Database Host Information
Now if you have gone through the above step and are sure about the correct credential in the database, then there might be an issue related to the incorrect database host information. Generally hosting companies use the local host as the default database host. But some of the companies opt out to use separate servers to host databases. So in that case, you need to enter the correct database host information instead of using the localhost as the default database. For that, you can contact your database hosting company.
3. Troubleshooting the 403 Forbidden error problem caused by a corrupted .htaccess File
A corrupted .htaccess file can be responsible for blocking your access to your website and causing a 403 forbidden error. To fix that, we need to repair the .htaccess file. Simply follow the given steps to get the file repaired and get rid of this problem.
- Access the website by using CPanel file manager or an FTP client program such as File Zilla.
- Find out the file in the Root folder of the website and download it to your system, so that it can be used as a backup from an additional point of safety.
- Just delete the file from the server through the File Manager or FTP client program.
- Now try to access the website and if you do not encounter any problem like the 403 error, you have successfully troubleshot the problem.
- Now generate a new file from the settings and then permalink settings. Simply click on ‘Save Changes’ to create a new file.
4. Troubleshooting the 403 Forbidden error problem caused by wrong or Incorrect File permissions
Wrong or Incorrect file permissions can also make your life troublesome while working on your WordPress website. Due to the incorrect permissions, the server thinks of you as an unauthorized malicious person with bad intentions. Thus it displays a 403 Forbidden error message and blocks your access to the website. You can fix the incorrect file permissions with the help of a WordPress hosting provider. The changes to the file permissions can cause further serious issues so get that done by some expert professional. However, If you want to do that yourself simply follow the given steps to get that done.
- Access your WordPress website using an FTP client program and move to the root folder where all the files are located.
- Just right-click on any folder and select the ‘File permissions’ option.
- A Permission dialogue box will appear that will show you all the essential details and information for the ‘owner’, ’Group’, and ‘public’ permissions.
- Now set the file permissions for the root folder to 744 or 755 and check the box ‘Recurse into subdirectories’ along with the ‘apply to directories only’ checkbox. Then click on ‘Ok’.
- The above process needs to be repeated for all the files. The process is similar to above only the file permission that is going to be used this time would be 644 or 640.
- Now try to access your website and check if the 403 Forbidden error is fixed or not.
We hope that this article would be helpful for you in understanding the possible causes along with the ways for troubleshooting the 403 Forbidden error.